Computed tomography in quality assurance – a practical example
What does a computer tomography (CT) scanner do in a factory? Just like in medical technology, it finds the smallest irregularities and shows where products and components can be optimised. It is simple, fast and accurate and thus enhances the quality of pumps and systems in the long term. Let’s look at how the technology is doing in industrial enterprise.
A new form of reactive quality management
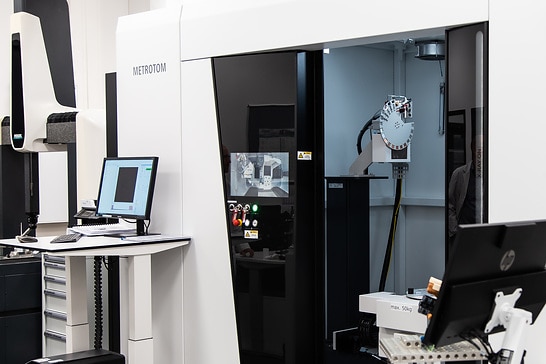
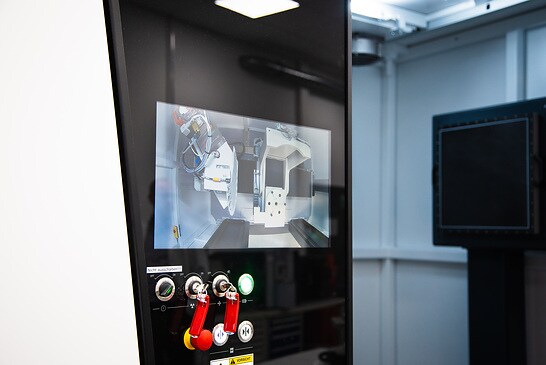
It is the “Factory of the Year 2022”: the Smart Factory at the Wilopark in Dortmund is a prime example of digital transformation. The multinational technology group has an innovative form of quality management there – where a CT scanner lends a hand. Unlike in a hospital, the Metrotom 1500 G3 from ZEISS is not a tube that people slide into, but rather a chamber. You can enter it through two black sliding doors. In the middle, there is a plate that spins. There is room on it for individual components or even entire pumps, which quality management staff examine with the CT.
CT scanner produces detailed 3D model
Although the device looks different from the one used in hospitals, it works in the same way. The device shoots X-rays at the object to be examined from one side. The object intercepts part of the radiation. Detectors on the other side measure the remaining radiation and transmit it to a computer system. Based on the intensity of the rays, it detects the density of the material and produces a two-dimensional image. However, the CT in the Smart Factory x-rays the object under examination from all sides. This creates a 3D model that shows the smallest details – even inside the individual materials.
“The advantages of using a CT scanner definitely outweigh any disadvantages”
Examining small objects closely
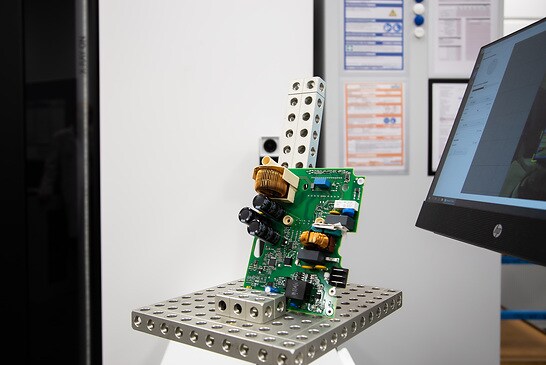
This is particularly helpful when the objects to be examined are very small. For example, in printed circuit boards, which are used in all electronic devices: the smallest electronic components are soldered onto their surface – each only a few millimetres in size. “If a component is not correctly connected to the board, it will most likely affect the electronics of the finished product later on. However, the problem is now easy to identify on the 3D models provided by the CT scanner”, explains Tim Schirmers, Wilo Plant Quality Manager Dortmund.
CT scanner simplifies quality inspection
If problems arise with pumps or components, they increasingly end up in Schirmers’ team, the Operations Quality department. The employees examine them using CT and prepare a test report. Things were different in the past: before CT scanners existed, the team used to carry out a series of tests to isolate the fault. A test in an internal or external laboratory then showed whether the diagnosis was correct or not. In addition, the object being examined underwent an OK/not OK test: the staff removed the faulty component (not OK), installed a new, non-faulty one (OK) and tested the function again. In many cases, Wilo also used to send the component to the supplier, who tested it again. A test report was produced after all this. Manufacturing of the affected product was halted over this long process. “The advantages of using a CT scanner definitely outweigh any disadvantages”, continues Schirmers. More specifically, they are:
Simpler: Computed tomography of products and components makes troubleshooting easier than ever before. After all, it is easier to find out where the fault is on the cross-sectional images than through extensive testing. The CT scanner examines its “patients” down to the smallest detail. Not to mention the fact that the 3D images can be shared easily with other Wilo departments or suppliers around the globe.
Faster: This also affects the speed. The problem is localised more quickly. In addition, the Operations Quality department no longer dismantles components by hand and sends them less frequently to external laboratories or even to suppliers for analysis.
More accurate: If pumps or components have to be dismantled, there is a risk of destroying the source of the fault as they are disassembled. Thanks to computed tomography, one can take a look inside the object under examination, without actually having to open it. And because CT generates digital 3D models, the result of the search is also very well documented.
“We’ve significantly increased the speed, precision and efficiency of reactive quality management at Wilo – and thus enhanced product quality in the long term”
How dangerous are the rays?
Even though X-rays are harmful to the body in the long run, the CT scanner does not pose any danger to the staff of the Operations Quality team. The thick walls of the Metrotom 1500 G3 safely shield the radiation inside from the outside world. “In addition, my colleagues receive training on the device and the associated risks”, explains Schirmers. As required by the Radiation Protection Act, Wilo has also trained three employees as radiation protection officers. The law also requires that they take courses to refresh their knowledge every five years.
“The rate of use of the CT scanner is high – the purchase was worthwhile”
To organise the large number of jobs for the CT team, Wilo has set up a ticket system. Colleagues from the Wilo plants in Dortmund and Hof (Germany) as well as Laval and Aubigny (France) use this system to register their needs. In the past twelve months alone, 250 tickets have been processed by Schirmers’ team. “The rate of use of the CT scanner is high and the feedback from our clients is consistently positive. So the purchase was definitely worth it”, says Schirmers. It is not yet possible to put a definitive figure on how much, but “We’ve significantly increased the speed, precision and efficiency of reactive quality management at Wilo – and thus enhanced product quality in the long term.”
Simpler, faster, more accurate: computed tomography for even more quality
With the ZEISS Metrotom 1500 3G, Wilo uses computed tomography to examine individual components or entire products in its Smart Factory in Dortmund. This enables the staff of the Operations Quality team to find even the smallest potential for improvement for and inside products. In the past, they had to dismantle the objects under examination and perform numerous individual tests. The new type of reactive quality management using CT is simpler, more accurate and faster, thus contributing to the quality of Wilo products in the long term.
